|

The Action Bar is situated at the bottom of the Main Form.
Action Bar buttons
Along the top of the Action Bar are buttons indicating which actions are available to you depending on the state of the job currently displayed on the main form. For example, if you are entering the details for a new job you will be able to book it in, delete it, produce a quote etc. If you are viewing an existing job that has been booked out and invoiced you will have different choices. This behaviour can be described as "context sensitive", meaning that the options change depending on the state of the job.
You can either click a button with your mouse, or press the Function key on your keyboard that is associated with that action - as shown as the 'F' key on each button. You can also use the Action Menu to perform these actions.
Also check all the other available Keyboard Shortcuts.
Action Bar button
|
Keyboard equivalent
|
Description
|
F2 Copy to new
|
F2
|
| • | You will be asked to confirm Copying to New Job unless you add the appropriate Auto Confirm option to the current user's profile. |
|
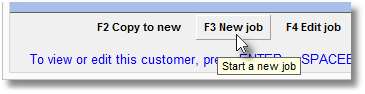
F3 New job
|
F3
|
| • | Create a new empty job with the next available job number. If you would prefer to create a new job using a job number that you specify, you can type the number into the Job # box on the main form and press Return, rather than using the "F3 New job" action. |
| • | If you already have a customer selected on the main form, this will remain on the form and will be linked to this job. |
|
F4 Edit job
|
F4
|
| • | Edit the job currently displayed on the main form. To edit a completed job, you will first need to void the invoice. |
| • | You will be asked to confirm Editing a Job unless you add the appropriate Auto Confirm option to the current user's profile. |
| • | Check the Job State article for further details. |
|
F5 Print
|
F5
|
| • | Show the print dialog, from which you can choose to print eligible documents for the job in its current state. You can have the print dialog automatically suggest printing of particular documents related to the current state of the job - you can configure this from Printing Rules in the Control Centre. |
|
F6 Quote/Hold
|
F6
|
| • | Place the current job on hold. This is useful for providing quotes for customers, or for otherwise entering a job onto the system but not indicating that work has been started on it. |
| • | You will be asked to confirm Holding a Job unless you add the appropriate Auto Confirm option to the current user's profile. |
| • | You can have the print dialog automatically suggest printing of particular documents related to the current state of the job - you can configure this from Printing Rules in the Control Centre. |
| • | Check the Job State article for further details. |
|
F7 Book In
|
F7
|
| • | Normally you would create a job and then book it in using this action, to indicate the job is being worked on in the lab. |
| • | You will be asked to confirm Booking In unless you add the appropriate Auto Confirm option to the current user's profile. |
| • | You can have the print dialog automatically suggest printing of particular documents related to the current state of the job - you can configure this from Printing Rules in the Control Centre. |
| • | Check the Job State article for further details. |
|
F8 Bookout Ongoing
|
F8
|
| • | Book a job out as Ongoing to indicate the job may have been sent to the customer for review, try-in etc. An ongoing job is not chargeable yet as you are expecting the item to be returned for further work to be done on it. |
| • | You may wish to also set the Dept/Stage before Booking Out Ongoing, to indicate the stage of the job. You can set up your depts and stages from the Depts/Stages page of the Control Centre. |
| • | You will be asked to confirm Booking Out Ongoing unless you add the appropriate Auto Confirm option to the current user's profile. |
| • | You can have the print dialog automatically suggest printing of particular documents related to the current state of the job - you can configure this from Printing Rules in the Control Centre. |
| • | Check the Job State article for further details. |
|
F9 Bookout Completed
|
F9
|
| • | Book a job out as Completed. This will create an invoice for the job (using the next available invoice number) at the tax date you specify on the confirmation screen. |
| • | A Booked Out Completed job is the final stage of a job and indicates that the customer will be invoiced for it - as such this job will now appear on statements and summary invoices. |
| • | You will be asked to confirm Booking Out Complete unless you add the appropriate Auto Confirm option to the current user's profile. |
| • | You can have the print dialog automatically suggest printing of particular documents related to the current state of the job - you can configure this from Printing Rules in the Control Centre. |
| • | A completed job cannot be modified or deleted without first voiding the invoice associated with it. |
| • | Check the Job State article for further details. |
|
F10 Delete job
|
F10
|
| • | Delete the current job. You will be asked to confirm this action. |
|
F12 Clear form
|
F12
|
| • | Clear the main form of any job and customer selections you have made. This will not modify the job you are currently viewing, just clear it from the main form. |
|
Help text
Along the bottom of the Action Bar you will see helpful text related to the action you are currently performing, or the item you currently have highlighted.
Email status icons
To the right of the Action Bar are coloured boxes representing the status of emails.

Emails failed
This red box will only appear if any of the emails you created have failed to send. The number shown in the box represents the number of failed emails.
Click on the box to view a list of your failed emails, along with the reason for failure.
Common reasons for failing are an incorrect email address used, or your Emailer Setup settings are incorrect. If you update the password for your email account, please remember to update this in the Emailer Setup too.
View the Emails Failed page for further details.

Emails pending
This orange box will only appear when you have emails waiting to send. The number shown in the box represents the number of emails queued to be sent.
When you create an email, it is actually queued for the Transactor Emailer to send. By default, every 4 seconds the Emailer checks for any queued email from all Transactor users and then attempts to send them in the order they were created.
If the number on the orange box has not decreased for some time, you should check the Transactor Emailer application is running. This application normally starts at the same time as Transactor, or for multi-user network users the Emailer would normally only run on the server.
View the Emails Pending page for further details.

Emails sent
This green box indicates the number of emails successfully sent today. Although an email may have sent from Transactor successfully, it is still subject to the recipient's mail server accepting the message as well as the recipient's own spam filtering or other mail rules.
By clicking this box you can view a list of the emails sent today or since Transactor was installed, for the current user or all users.
View the Emails Sent page for further details.
|